
Specular Matching - My top trick for creating composite photos in Photoshop
Sep 09, 2022The one thing I hear all the time from students, and even colleagues who are pretty dang good with Photoshop, is "I just can't ever get my composites to look realistic."
They go through every color adjustment layer hoping one will work, trying to adjust the color and lighting of the different elements to try and get them to match. They get frustrated because even if they do find a decent solution, it almost feels like it was by accident.
And working like that is time-consuming.
I like retouching workflows that I can rely on every time.
There's a technique I teach in Chapter 7 of my new video course Photoshop Creative Effects: The Overlay Brush Workflow that I refer to as specular matching. If you only learned one quick trick from the course, this is the one I hope you'll get.
Here it is in a nutshell:
Usually, one of the top things that throws off a composite integration is that the specular highlights of one or more elements don't match the ambient lighting of the environment they're placed into. It's often just that simple!
Now, it can be tough to actually target those highlights with just levels, curves, hue/saturation, etc. You have to do a little masking.
My trick is to isolate the specular highlights of the model, create a mask just from the highlights I want to target, and instead of using levels or curves, I use a Color Fill layer.

Then I have total control of the color and lighting of the speculars, and I don't need to worry about any hue shifts because I'm telling them exactly what color to be. Then I match that to the ambient lighting of the environment.
Now this might sound a little complicated in writing, but I can usually set this up in about 3 minutes, and if I use my Photoshop action, it's even faster.
In my new Overlay Brush Workflow course I take you through each step so you can see exactly how I do it.
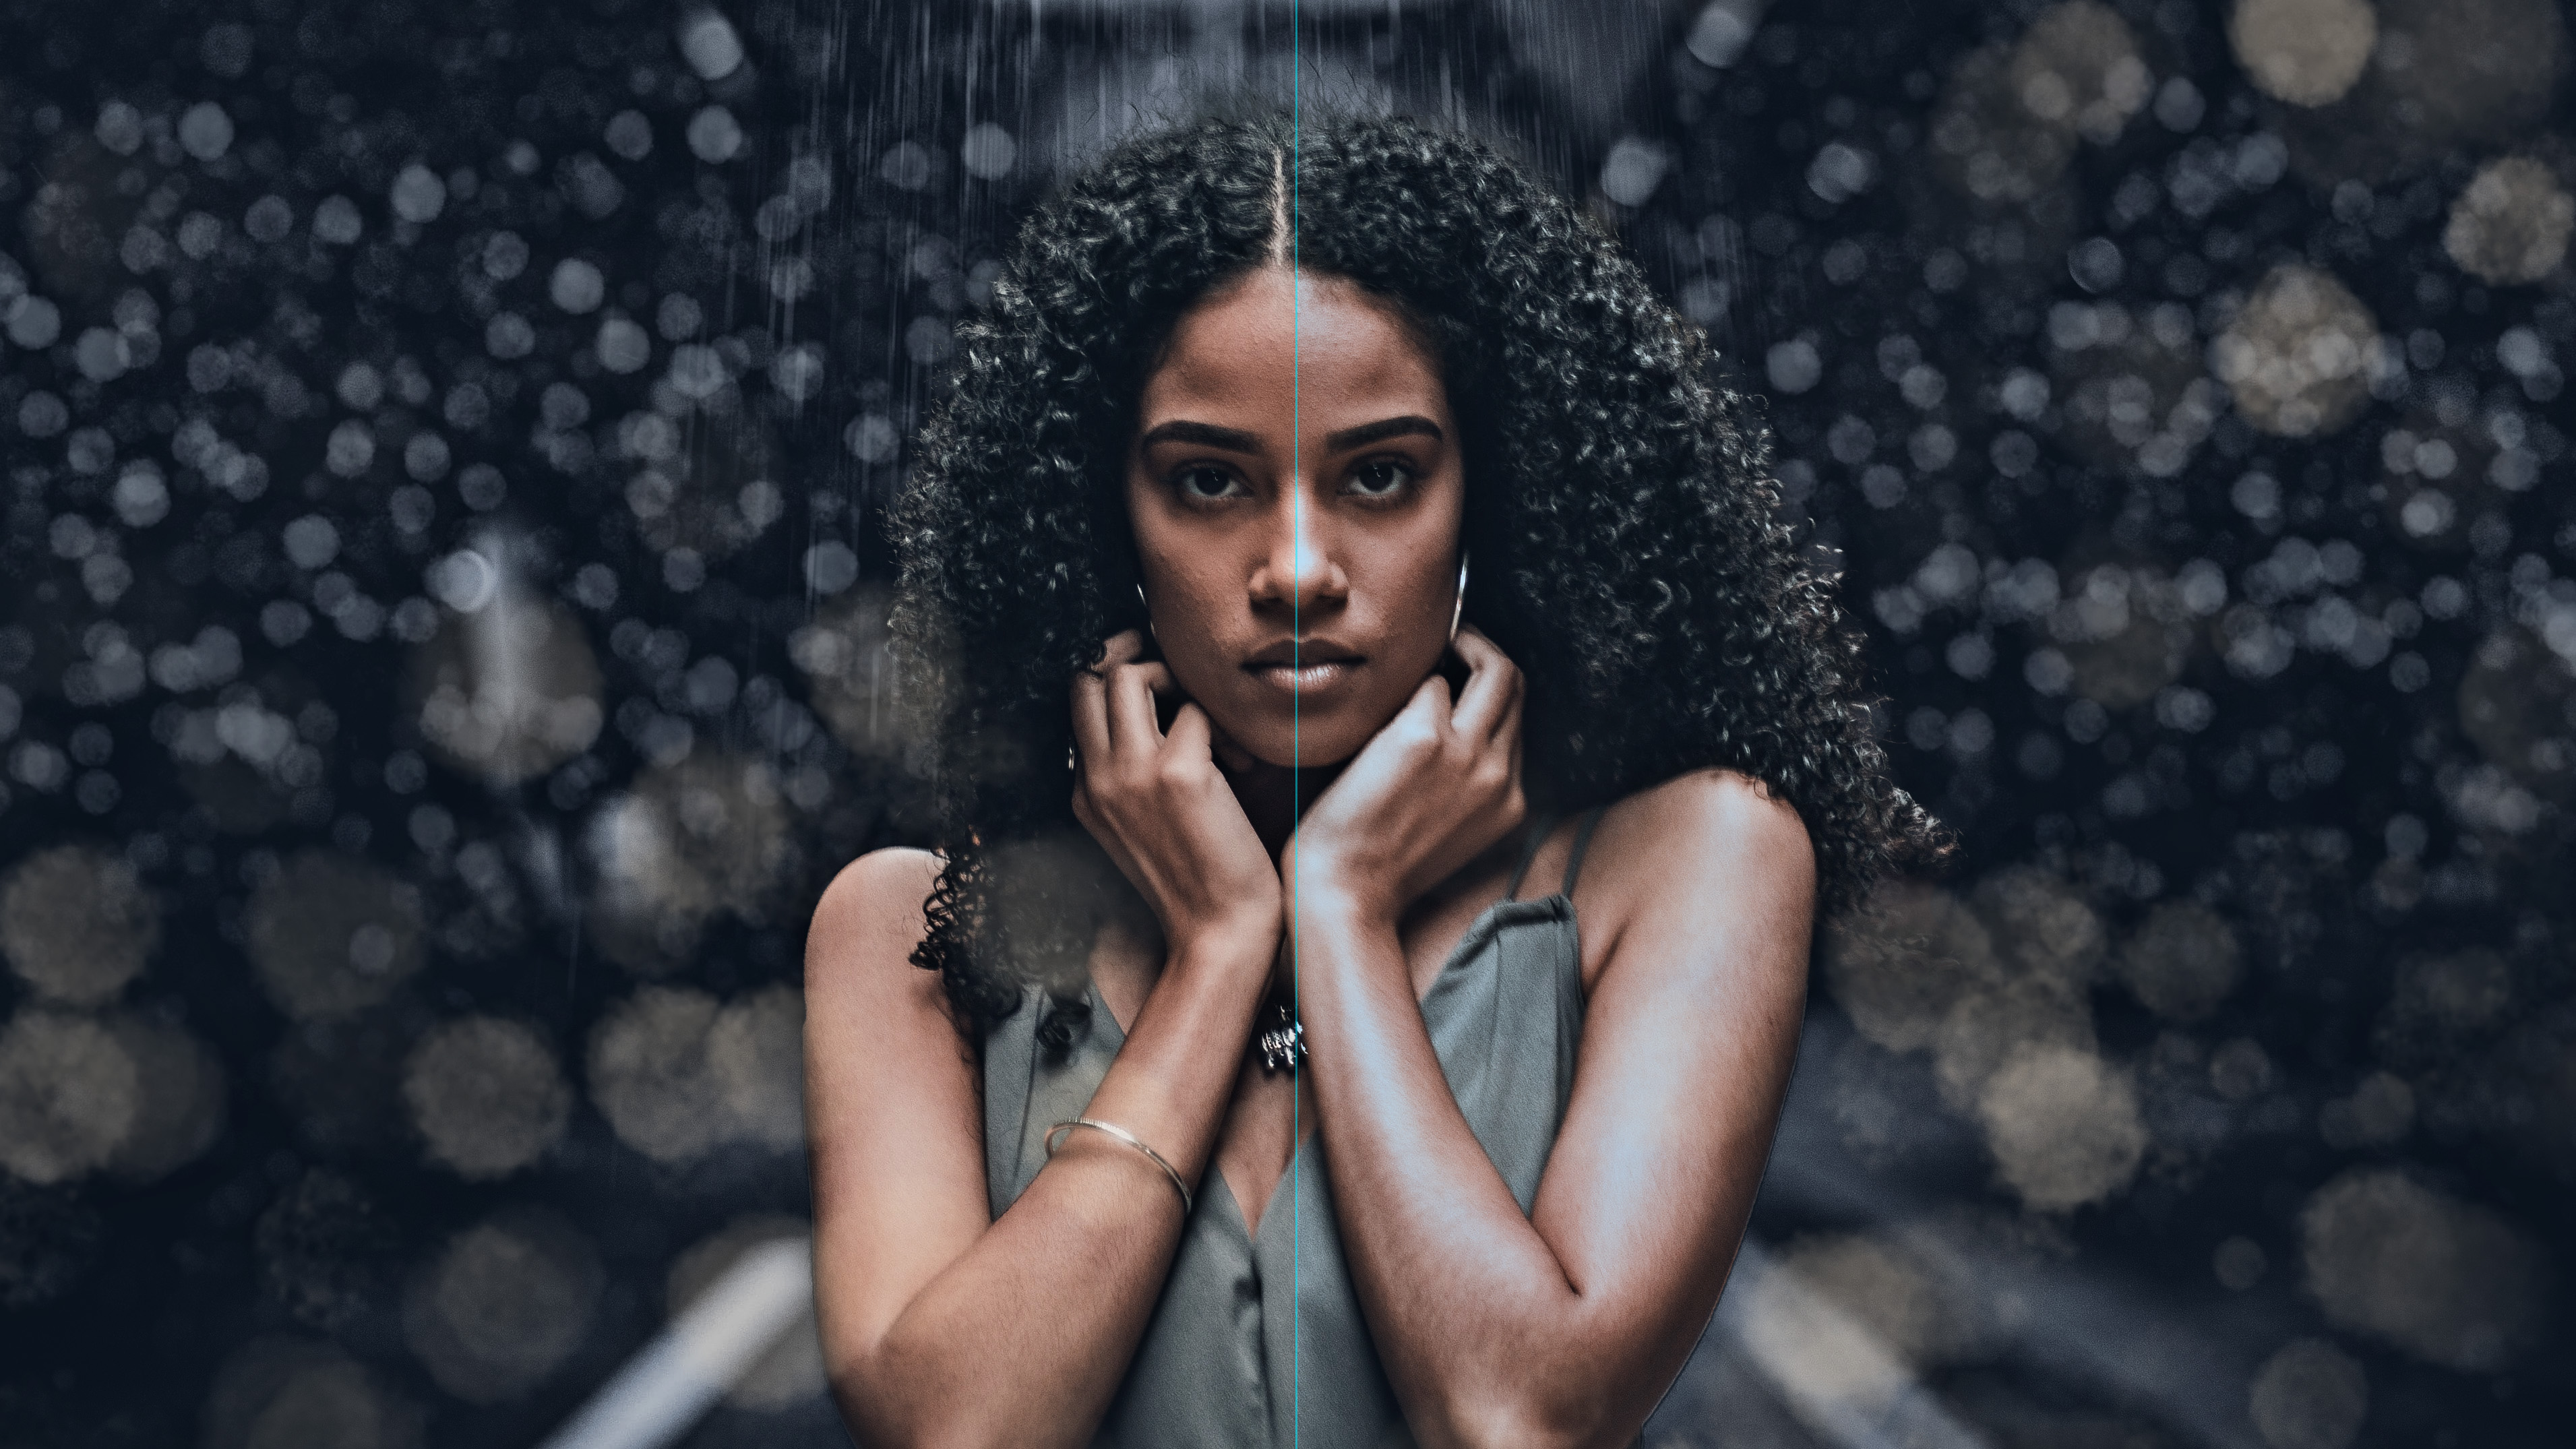
It can also serve as a really effective skin pop trick to really add shine and volume to skin, fabric, and more. I also used it in this beautiful image by photographer Jade Elizabeth below:

This is just one of the many workflows and power tricks I teach in my new course. There's a lot of cool content around my new Particle Overlay Brushes and how to use them, but what's just as important are all of the methods we use as creative retouchers to explore creatively.
And once you learn a few of these techniques you can rely on every time, Photoshop becomes a whole lot more fun.
Stay creative my friends,
Sef
